Four Easy Ways to Debug Network Requests in Flutter

When I first started working with Flutter, I was surprised to find that it has no built-in tooling to debug network requests. While it does provide a solid debugging experience via Flutter DevTools, inspecting network requests isn’t part of the package.
As developers living in an age where apps that connect to the internet are the norm, being able to debug network requests is a necessity.
So what are my options?
While the Flutter team is planning to add a network profiler to DevTools, there is no release date in sight. In the meantime, here are four tools that will allow you to debug network requests in Flutter:
Option 1: Old Fashioned Logging
Use the logs package to write network requests directly to Flutter DevTools' logging view or to your system console. This is by far the most primitive method, but also the easiest to setup.
Getting Started with logs
- Install the logs package
- Enable HTTP Logging in your Flutter app
// main.dart
import 'package:logs/logs.dart';

final Log httpLog = Log('http');

void main() {
  httpLog.enabled = true;
}
Once you’ve added the above code to your app, open Flutter DevTools, and check out the “Logging” view. Here’s what you’ll see when HTTP requests are made:
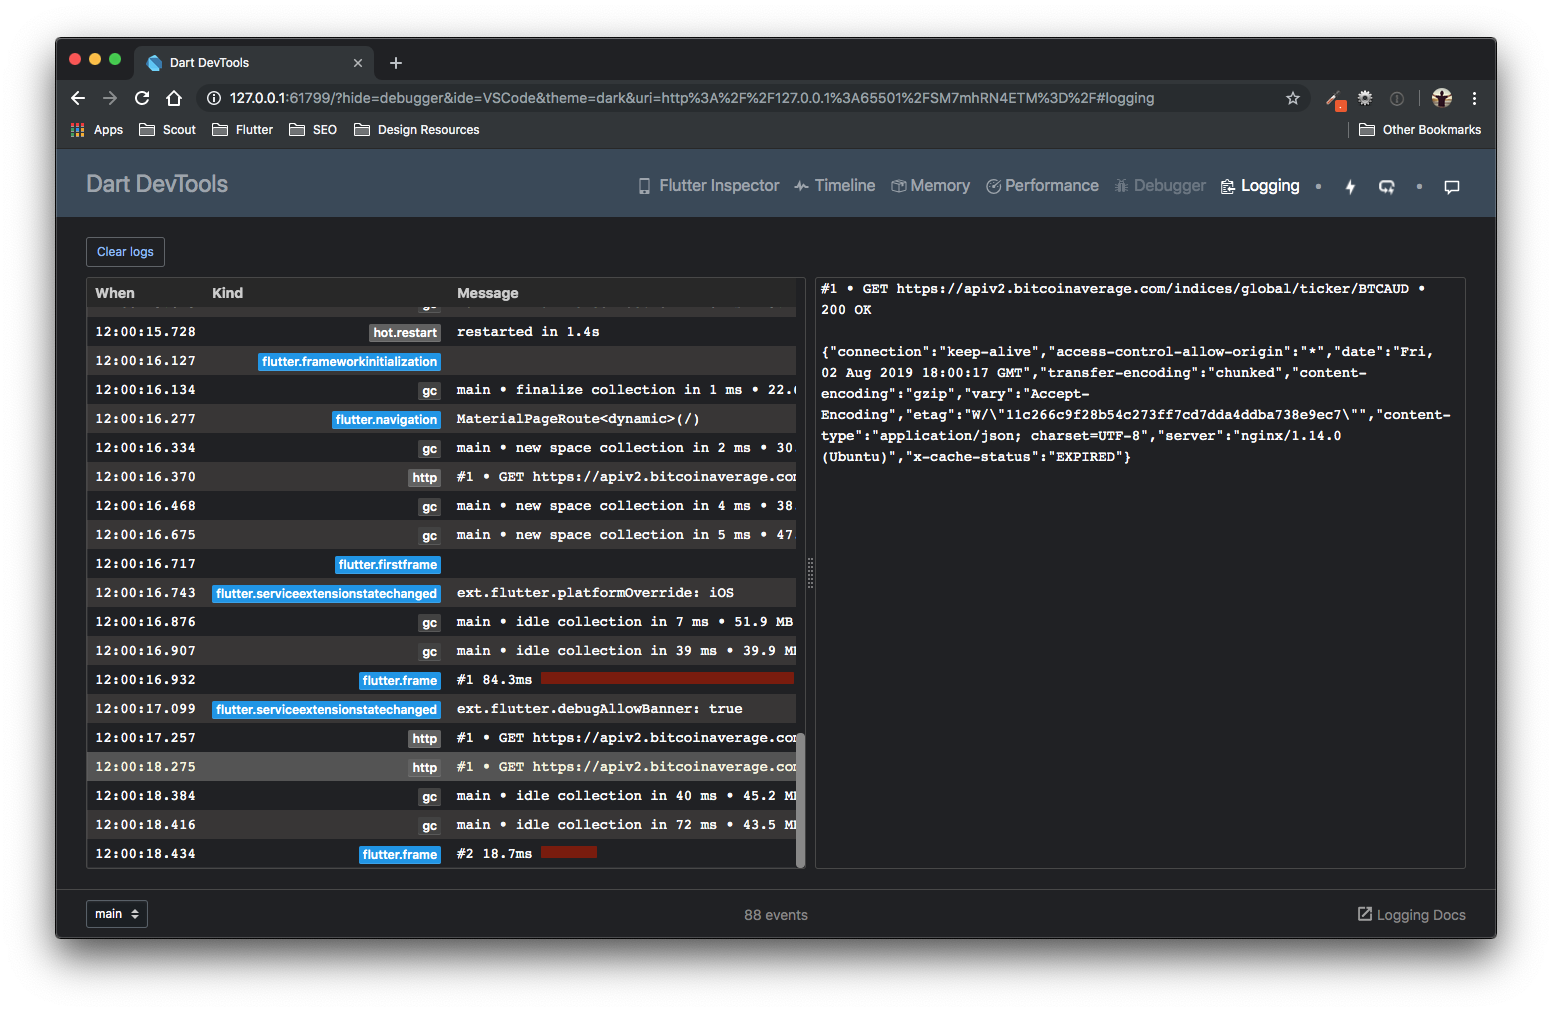
As you can see, this is very raw and NOT easy to ready. I don’t know about you, but I’m ready for another option!

Rating: 2 / 5
- (+) Quick to setup.
- (+) Access to the full, raw output.
- (-) Raw output isn’t friendly to read… at all 🤯.
Option 2: Use Alice
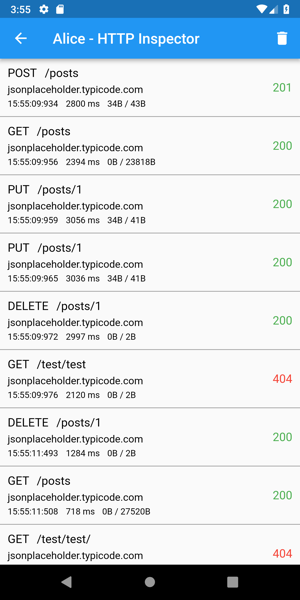
Alice is an HTTP Inspector for Flutter. It’s heavily inspired by the Chuck tool for Android.
The most interesting thing about Alice is that you view its interface directly in your app. There isn’t a desktop application or a separate console to view requests. Every HTTP request is logged and displayed through a UI that’s available from within your Flutter app.
Getting Started with Alice
For installation and usage instructions, please see the official docs as they will always be the most up-to0date. There’s also a fantastic article that does an in-depth review of how to use Alice in your app.
Rating: 3 / 5 stars
- (+) Highly configurable.
- (+) Works with all of the major Dart HTTP packages.
- (+) All the information you’d need when debugging an HTTP request/response.
- Setup isn’t trivial, but not difficult.
- (-) The interface can only be viewed from within your app, which may be undesirable.
Option 3: Use Flipper
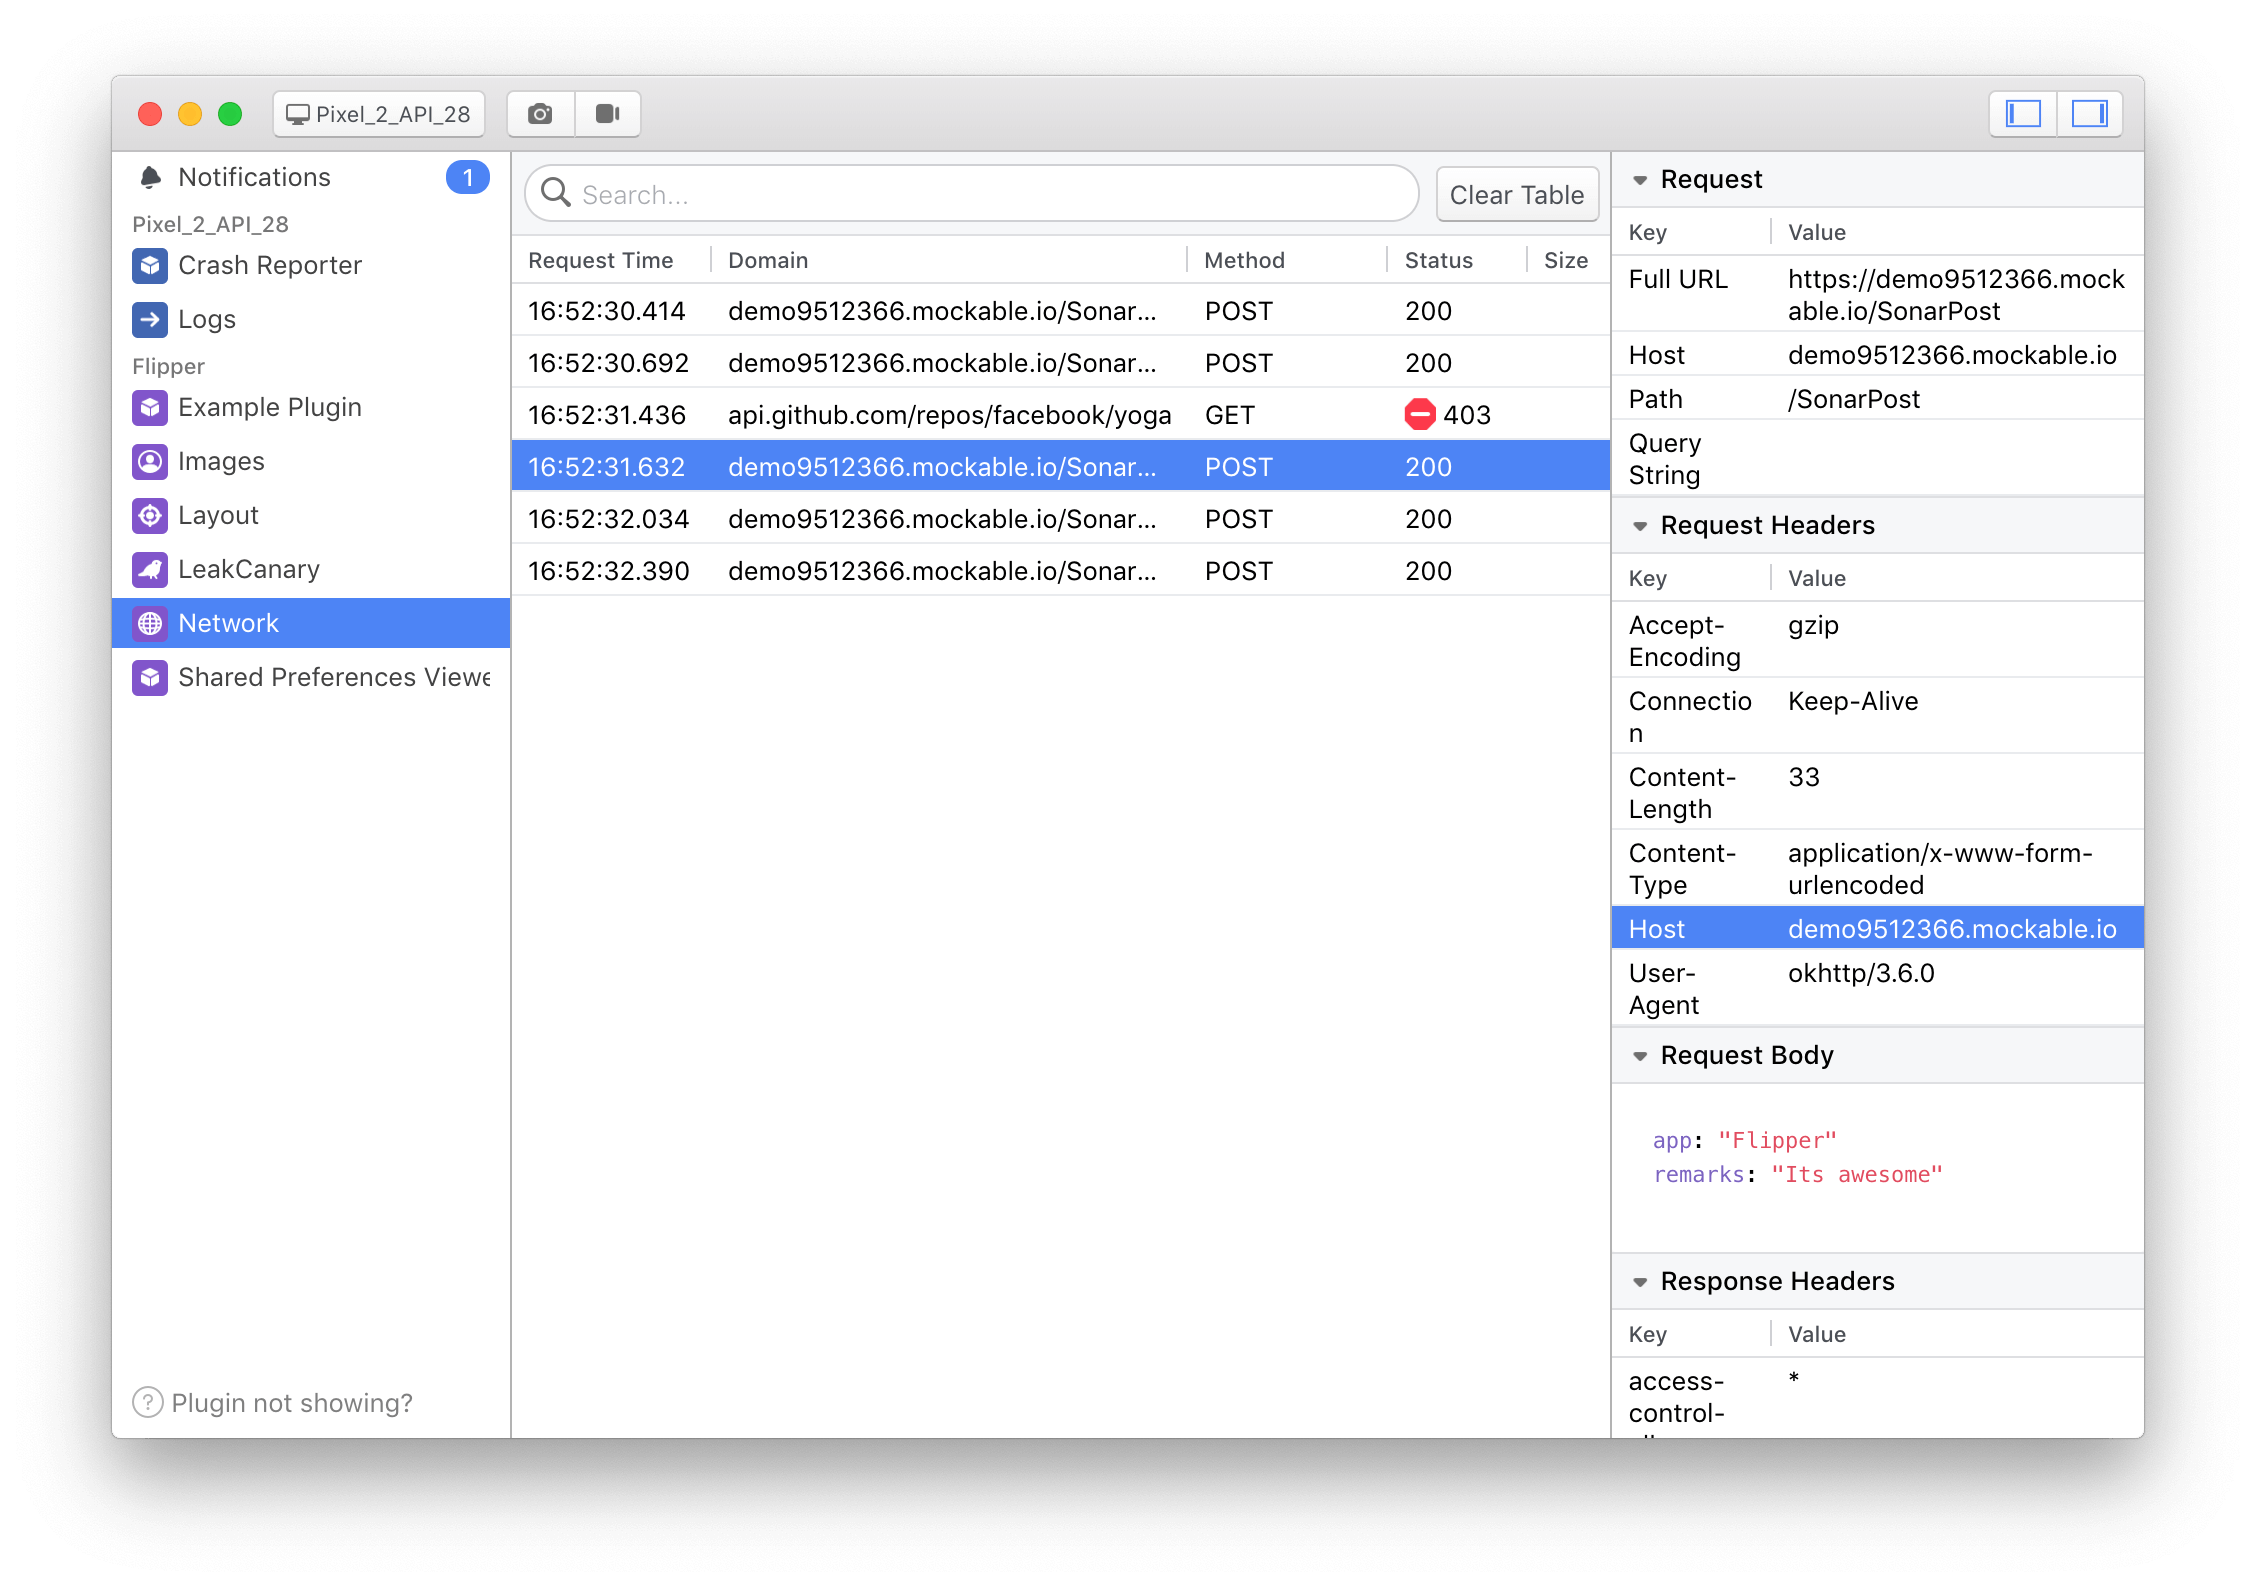
Flipper is a desktop app from Facebook that allows you to debug iOS and Android apps. Much like you’d see in REST clients like Postman and Insomnia, network requests are broken down into their parts making it super simple to see headers, status, method, etc.
In addition to being able to debug your network requests, there are some really awesome plugins for viewing Shared Preferences, SQLite databases, Redux stores and more.
Getting Started with Flipper
- Download Flipper
- Install the flutter_flipperkit package
Installation Notes
-
After you’ve followed the
flutter_flipperkitinstallation instructions, make sure to stop and start your app as changes made tomain.dartwill not take effect through hot reload. -
If you’ve modified your
Podfileand are planning on running your app on an iOS Emulator, you may see a message likeRunning Pod Installafter you start your app. This can take a very long time. In my case, it took over 20 minutes. The unfortunate thing is that the long wait time makes it seem that the process may have hung, but in actuality, no progress is displayed as mentioned in this Github issue. That said, take a break and give it time to do its thing. -
If you run into the error
The 'Pods-Runner' target has transitive dependencies that include statically linked binarieswhen the Pod install process is running, try the workaround mentioned here.
Once you’ve installed the package and instrumented your app, launch the Flipper desktop app and trigger some network requests.
Here’s a preview of what you’ll see:
Rating: 3.5 / 5
- (+) All-in-one application for debugging network requests in Flutter, viewing logs and crash reports for both iOS and Android.
- (+) Network inspector feels similar to Insomnia or Postman, which is a good thing ❤️.
- (+) Extensible via plugins — view your SQLite Database, Shared Preferences and more!
- Officially supported on macOS only at the moment, but still works on Windows/Linux.
- (-) Doesn’t work on physical devices…yet.
- (-) Requires external dependencies that really slow down the build time of your application.
Option 4: Use a Debugging Proxy
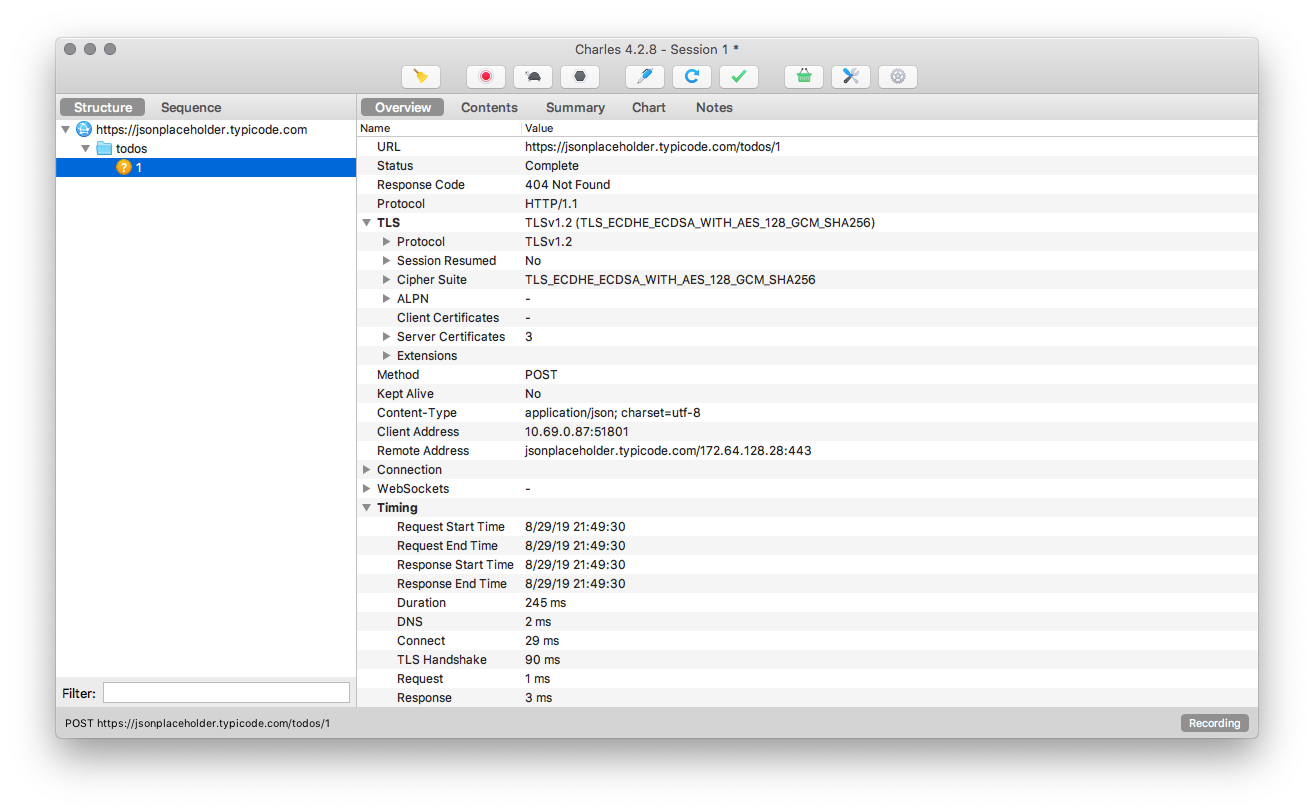
For this article, I’ll focus on one of the most popular debugging proxy applications available: Charles.
Charles is available for macOS, Windows, and Linux. There’s a 30-day free trial — after the trial, it’s $50 for a license. If you’re looking for a free option, check out Fiddler (cross-platform) or Proxyman (macOS).
Wait…what’s a proxy?
For our purposes, a proxy is basically an intermediary that sits between your Flutter app and the internet. Using Charles as an example, your Flutter application will be configured to use Charles, the HTTP proxy, to connect to the internet (or your local dev server). By doing so, Charles can then record any traffic between your app and the internet and allow you to inspect it.
Getting Started with Charles
- Download Charles
- Install Charles
Getting Charles to work with Flutter
Currently, Flutter does not use the system-level proxy, so if you’ve configured your system to use Charles as its proxy, you won’t see any requests logged.
The good news is that you can work around this issue by manually configuring Flutter’s HTTP client to use Charles as its proxy. Depending on which HTTP client you’re using, the steps will be slightly different. In this article I’ll cover the following:
- Dart’s HttpClient class
- The http package
- Dio
I’m using HttpClient
// Make sure to replace <YOUR_LOCAL_IP> with
// the external IP of your computer if you're using Android.
// Note that we're using port 8888 which is Charles' default.
String proxy = Platform.isAndroid ? '<YOUR_LOCAL_IP>:8888' : 'localhost:8888';

// Create a new HttpClient instance.
HttpClient httpClient = new HttpClient();

// Hook into the findProxy callback to set
// the client's proxy.
httpClient.findProxy = (uri) {
  return "PROXY $proxy;";
};

// This is a workaround to allow Charles to receive
// SSL payloads when your app is running on Android
httpClient.badCertificateCallback =
  ((X509Certificate cert, String host, int port) => Platform.isAndroid);
I’m using the http package
Configuring Charles to work with the http package is nearly identical to configuring it for HttpClient:
- Configure a new instance of
HttpClientto point to your proxy as shown above. - Instantiate a new instance of http.IOClient with the instance of
HttpClientthat you’ve just created.
IOClient gives you the same interface to make requests as the canonical http example.
// Make sure to replace <YOUR_LOCAL_IP> with
// the external IP of your computer if you're using Android.
// Note that we're using port 8888 which is Charles' default.
String proxy = Platform.isAndroid ? '<YOUR_LOCAL_IP>:8888' : 'localhost:8888';

// Create a new HttpClient instance.
HttpClient httpClient = new HttpClient();

// Hook into the findProxy callback to set
// the client's proxy.
httpClient.findProxy = (uri) {
  return "PROXY $proxy;";
};

// This is a workaround to allow Charles to receive
// SSL payloads when your app is running on Android.
httpClient.badCertificateCallback =
  ((X509Certificate cert, String host, int port) => Platform.isAndroid);

// Pass your newly instantiated HttpClient to http.IOClient.
IOClient myClient = IOClient(httpClient);

// Make your request as normal.
var response = myClient.get('/my-url');
I’m using Dio
// Make sure to replace <YOUR_LOCAL_IP> with
// the external IP of your computer if you're using Android.
// Note that we're using port 8888 which is Charles' default.
String proxy = Platform.isAndroid ? '<YOUR_LOCAL_IP>:8888' : 'localhost:8888';

// Create a new Dio instance.
Dio dio = Dio();

// Tap into the onHttpClientCreate callback
// to configure the proxy just as we did earlier.
(dio.httpClientAdapter as DefaultHttpClientAdapter).onHttpClientCreate = (client) {
  // Hook into the findProxy callback to set the client's proxy.
  client.findProxy = (url) {
    return 'PROXY $proxy'?;
  };

  // This is a workaround to allow Charles to receive
  // SSL payloads when your app is running on Android.
  client.badCertificateCallback = (X509Certificate cert, String host, int port) => Platform.isAndroid;
}
Notes on SSL Proxying
-
If your app is connecting to a server running SSL, you’ll need to set up SSL Proxying in Charles. The first step is to install Charles’ root certificates. Check out this link for instructions on how to do so depending on how you’re connecting to Charles (iOS Device, iOS Simulator, etc.).
-
Once you’ve installed the necessary certificates and Charles is logging your requests, you may see the following error when viewing one of your requests: “SSL Proxying not enabled for this host: enable in Proxy Settings, SSL locations.” To fix this, just right-click on the request and select “Enable SSL Proxying” from the menu and you should be good!
Rating: 4 / 5 stars
- (+) Everything you want to know about any network request made to or from your app (or any other application connecting to the Internet!).
- (+) Extensive network-related capabilities that go beyond the scope of this article.
- Charles isn’t free but if you’re doing a lot of work where debugging network requests is important to you, it’s well worth the license fee. Regarding free options, I haven’t tried Fiddler, but I can say that for macOS, Proxyman is nearly equal to Charles in capability and a better user interface, IMO.
- Setup isn’t trivial, but not overly difficult. It only gets nasty if your local application is running SSL.
Conclusion
While it all comes down to personal preference, my opinion is that using a Debugging Proxy is the best available option to debug network requests in Flutter. Here’s why:
- Charles, Proxyman, and Fiddler are all separate desktop applications that connect to your app and not embedded within it. This is my biggest gripe with Alice. While Alice gives you what you need, the last thing I want to be doing is viewing HTTP request data on a small screen.
- Each of the aforementioned applications breaks down requests into consumable chunks unlike the
logspackage, which simply outputs everything to the console without any formatting. - While Flipper is more robust in that it can do more than just log network requests, the installation of external dependencies adds time and friction to the build process that ruins an otherwise great experience.
What’s your preferred method of debugging network requests in Flutter? Do you have a better way I didn’t discuss here? Let us know in the comments!